
 Harriet Wetton
When you are choosing new clothes, tailoring a specific garment, or tracking your body composition progress, getting exact body measurements is the foundational secret to success.
Among all the physical dimensions you might track, knowing how to measure hips accurately is one of the most critical skills you can master. It ensures that your trousers, skirts, tailored suits, and activewear fit comfortably, drape elegantly, and move with your body without pulling or gathering in awkward places.
Beyond the realm of fashion and pattern drafting, your hip circumference serves as a powerful health and wellness metric. Medical professionals, personal trainers, and nutritionists frequently analyze the waist to hip ratio to understand visceral fat distribution, metabolic risk factors, and overall physiological wellness.
Whether your goal is a impeccably fitting wardrobe or an accurate fitness journal, taking the time to learn proper measurement mechanics pays huge dividends.
This comprehensive, expert guide will walk you step by step through the exact process professionals use to measure hip circumference with pinpoint accuracy.
If you are also interested in physical wellness and lower body mechanics, you might want to learn how to pop your hip safely or understand how these measurements relate to your overall joint mobility.
Why Learning How to Measure Hips is So Important
Understanding the proper way to take this vital measurement goes far beyond reading a static number off a flexible ribbon. Your hip circumference affects several aspects of your daily life, physical comfort, long term health goals, and personal style.
- Perfect Clothing Fit Every Time: Online shopping offers endless options, but sizing standards vary wildly between brands and regions. Accurate hip dimensions eliminate guesswork, reducing costly returns and ensuring garments lie flat across your seat and thighs.
- Tracking Real Fitness Progress: If you are embarking on a new wellness or body re-composition routine, the bathroom scale can be deceiving. Muscle gain and fluid balance often obscure loss of body fat. Tracking inches lost at the hip area gives you an honest, reliable metric of physical change.
- Professional Tailoring and Sewing: If you craft your own clothing, alter vintage finds, or work with a seamstress, the exact circumference around the widest part of your glutes dictates how patterns must be modified to allow full freedom of movement.
- Insightful Health Monitoring: Measuring hip circumference alongside waist size gives you actionable health insights. Studies published by institutions like the World Health Organization confirm that body fat distribution, particularly around the midsection and lower body, offers clearer predictions of cardiovascular wellness than weight alone.
Essential Tools for Taking Your Measurements
Before beginning the steps, you need to collect a few simple, high quality tools. Using the correct equipment prevents systemic errors and guarantees consistent numbers week after week.
- A Full Length Mirror: A full length mirror is non negotiable if you are taking measurements unassisted. You need a clear sightline to confirm that the tape remains parallel to the floor across your entire back.
- A Flexible Vinyl or Cloth Tape Measure: Never use a stiff metal carpenter tape. It cannot follow the natural contours of your body and will warp your reading. Choose a soft sewing tape measure that lays flat against skin.
- A Digital Note App or Paper Notebook: Record readings immediately to keep track without relying on memory.
- Appropriate Base Attire: Outer garments like jeans, thick skirts, or baggy sweaters add artificial bulk. Take measurements directly over your undergarments or ultra thin, form fitting athletic leggings for absolute precision.
How to Take Hip Measurement Accurately: Step by Step
Follow these twelve detailed steps to ensure your measurements are repeatable and reliable. Whether you are prepping for a custom clothing order or documenting personal transformation, consistency in technique is everything.
1. Find a Well Lit Full Length Mirror
Position yourself in a spacious, well illuminated room directly facing a mirror that shows your entire frame from head to toe. Standing in front of a mirror allows you to monitor your posture and confirm that the measuring tool sits level around your lower back.
While it is technically possible to take measurements blindly, doing so dramatically increases the risk of slipping, slanting, or twisting. Using a mirror ensures you double check that the ribbon isn’t tangled or twisted behind you, giving you an authentic horizontal loop.
2. Remove Any Bulky Clothing
To record true physical dimensions, you must measure as close to raw skin as comfortably possible. Heavy denim, pocket stitching, belts, and fleece garments easily add one to two extra inches to your recorded size, leading to ill fitting tailored clothes or distorted fitness records.
Ideally, perform this process while wearing basic cotton underwear or thin yoga pants. If you are learning how to measure hips for a specific event garment, wear the exact style of undergarments or shapewear you plan to wear beneath that garment.
3. Stand with Your Feet Completely Together
Standing position plays a massive role in hip dimensions. A common error is standing with feet hip width or shoulder width apart. Spreading your legs rotates the femur within the hip socket and shifts gluteal tissue, resulting in a noticeably larger reading.
For standard apparel sizing and health metrics, bring your heels and big toes completely together. Distribute your weight evenly across both feet, keeping your knees soft rather than rigidly locked.
4. Identify Your Natural Waist vs. Your Hips
Before wrapping the tape, establish the anatomical boundaries of your torso. Your natural waist is the narrowest point of your trunk, typically located an inch or two above your belly button where your body indents when bending side to side.
Your hips sit significantly lower, encompassing your pelvic girdle and the fullest curve of your gluteal muscles.
If you are building a complete profile for custom trousers or suit pants, combining this with knowing how to measure the inseam provides complete sizing clarity for length and rise.
5. Locate the Widest Point of Your Lower Body
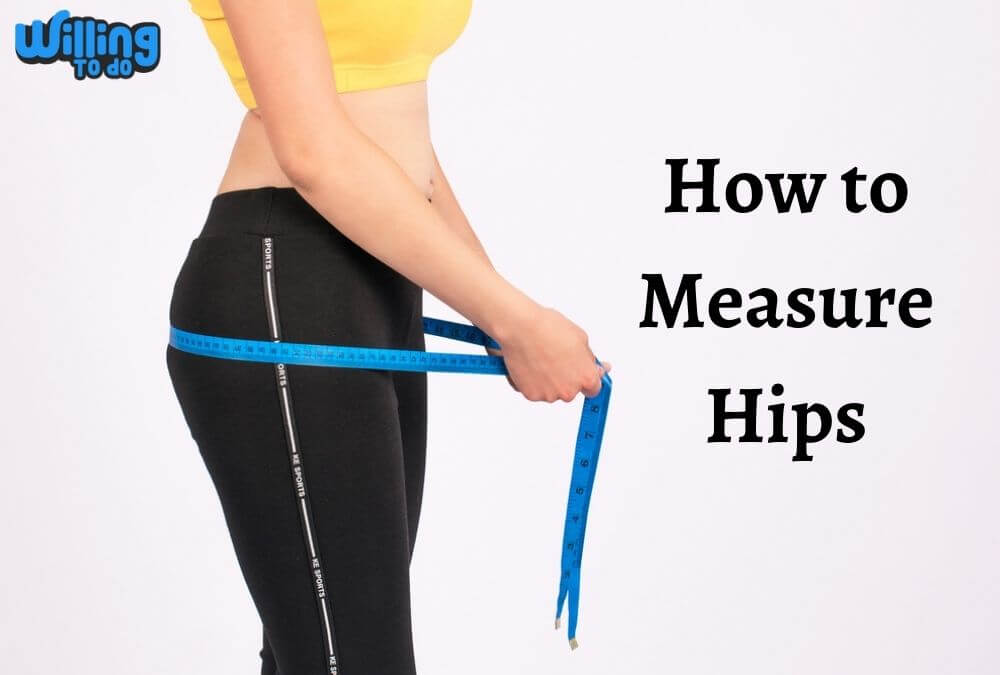
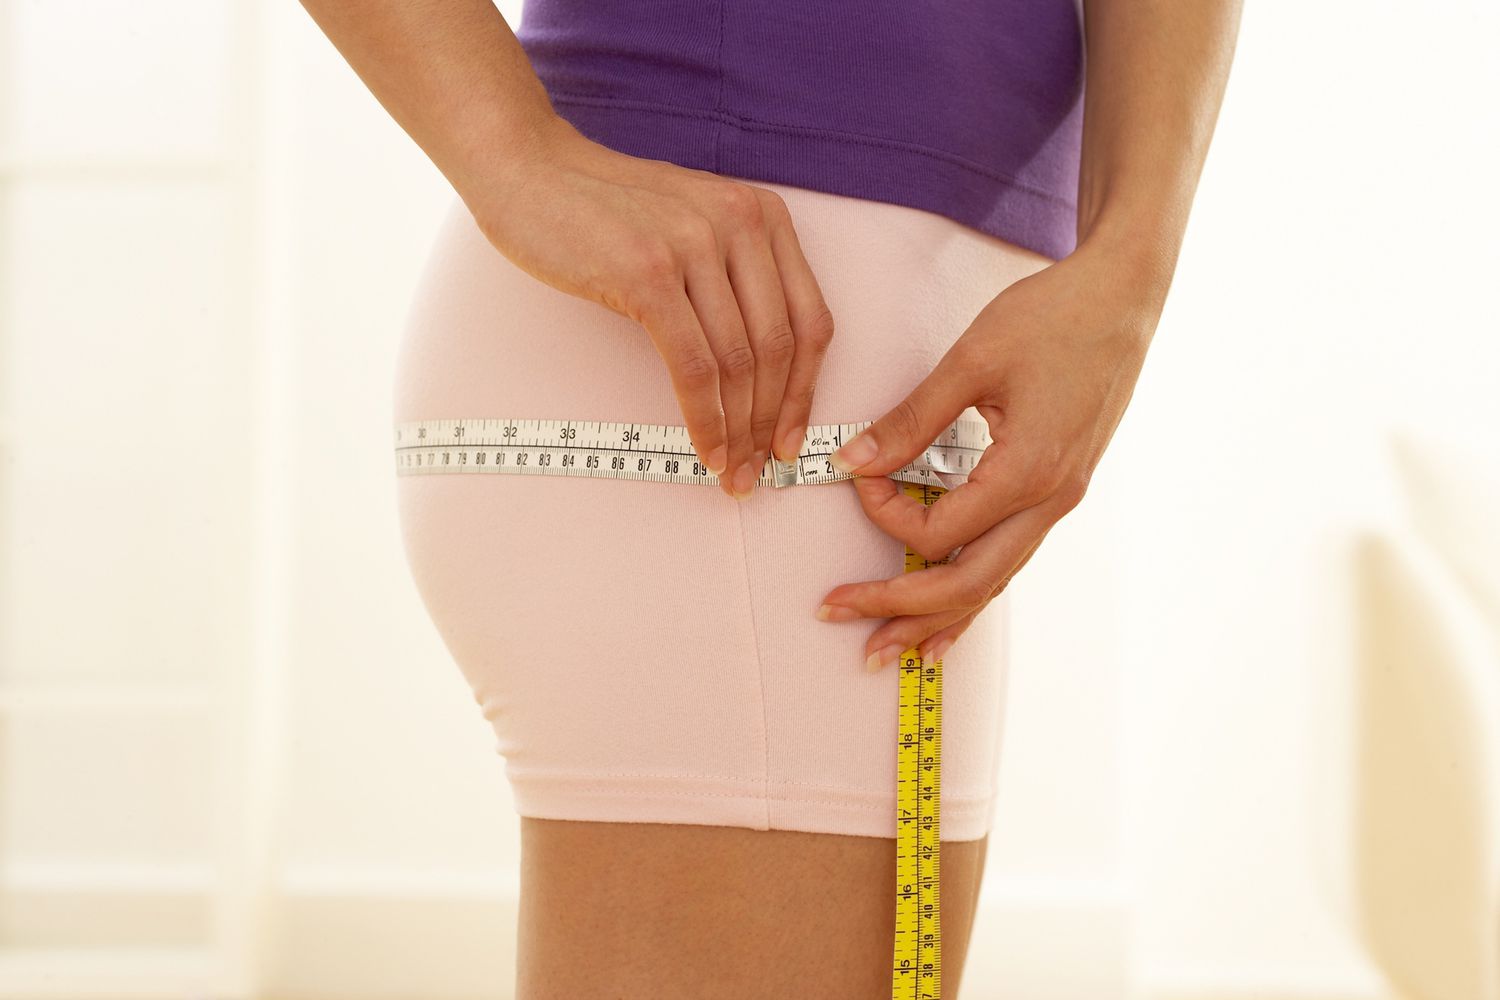
Feel along your side hips and glutes to find the maximum circumference. The true anatomical hip measurement used by garment manufacturers, tailors, and health frameworks requires capturing the largest visible perimeter across your buttocks.
Generally, this target zone sits approximately 7 to 9 inches below your natural waistline. However, this distance varies depending on your height, skeletal architecture, and muscle structure, so rely on visual confirmation in the mirror rather than a rigid ruler distance.
6. Position the Start of the Measuring Tape
Anchor the zero marker of your flexible tape against the side of your hip bone or center hip. Hold the end firmly against your body using one hand while using your opposite hand to carry the remaining length around your back.
Ensure the tape rests flat against your skin without twisting or turning upside down during the wrap.
7. Wrap the Tape Around Your Back and Seat
Smoothly bring the tape around your backside, keeping it flush across the crest of your glutes. Pay attention as you wrap to prevent the band from sliding upward toward your waist or dropping toward your thighs.
Maintaining a relaxed posture with feet joined gives you a stable baseline, keeping the soft measuring tape positioned where you placed it.
8. Verify the Level in the Mirror from All Angles
Turn sideways while keeping your body upright to inspect the tape in your mirror. The band must form a perfect horizontal plane that runs completely parallel to the floor beneath you.
If the tape dips low across your glutes or pulls upward over your abdomen, the total distance around your frame increases artificially, skewing the final number. Adjust the height on all sides until it sits level from front to back.
9. Check the Tension of the Tape
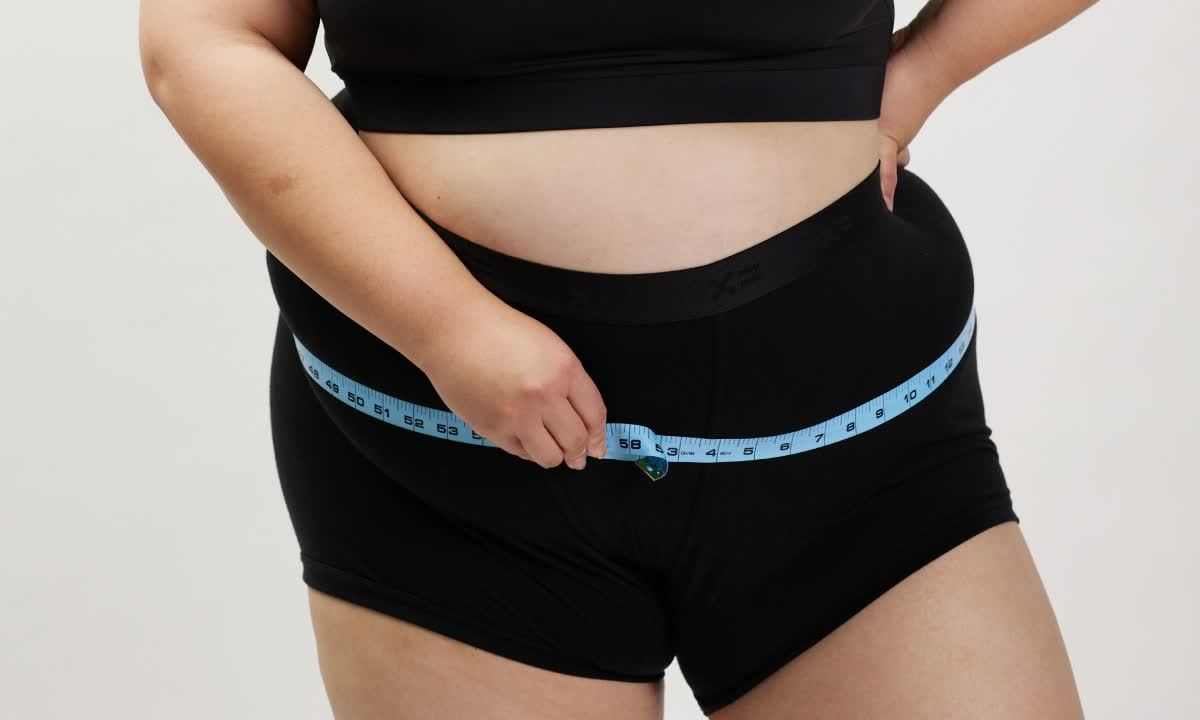
The tape measure should lie snugly against your body without biting into soft tissue or pinching skin. You are striving for a snug, comfortable contour fit. A reliable test for proper tension is sliding one finger comfortably under the band without stretching it out.
If the tape leaves an indentation in your skin or causes surrounding skin to bulge, you are pulling too tightly and will record an undersized metric.
10. Relax, Exhale Normal Air, and Read the Measurement
Stand naturally without holding your breath, flexing your glute muscles, or pulling in your lower belly. Inhale fully, then let your breath out naturally before looking at the intersection point on the tape measure.
Observe where the zero end lines up with the numerical scale. Take your time to read the tick mark accurately down to the nearest eighth of an inch or millimeter. If your sizing project requires full upper body tracking, you can also learn how to measure sleeves length for an all around tailored fit.
11. Record the Measurement Immediately
Log your reading instantly into a notebook or smartphone app. Note both imperial inches and metric centimeters, as garment size charts fluctuate between system standards.
Keeping an orderly log is immensely helpful if you are working to manage your weight or monitor body composition changes over several months. Consistent tracking helps you spot genuine long term trends rather than short term water weight fluctuations.
12. Account for Garment “Ease” in Pattern Design
If you are gathering these numbers for clothing construction, pattern drafting, or custom tailoring, remember that human bodies need physical room to sit, walk, and flex comfortably. A dress or pair of pants made precisely to your raw body measurements without extra margin will pull dangerously tight when sitting.
Sewing patterns incorporate structural allowance known as “ease” usually 1 to 3 inches added to the full hip measurement depending on fabric stretch and garment style, to ensure movement remains natural and unrestricted.
Pro Tips for High Hip vs. Low Hip Measurements
Certain dress patterns, high waist pants, and fitness assessments ask for two separate metrics: the high hip and the low (or full) hip. Understanding the distinction ensures your clothes fit seamlessly across your entire midsection.
- Locate Your Pelvic Bones for High Hip: The high hip sits approximately 2 to 4 inches below your natural waist, right over the prominent crests of your hip bones. This is higher than the widest part of your glutes.
- Measure Three Times for Precision: Because body contours shift slightly each time you move, take three consecutive readings and compute the average to ensure consistency.
- Avoid Rigid Measuring Tools: High hip curves require soft, pliable tools. Never attempt this with stiff rules or metal tapes, which bridging over low spots and produce exaggerated numbers.
- Maintain a Neutral Stance: Tension in your legs or back alters body shape. Shake out your legs, take a slow breath, and return to a relaxed, feet together position before wrapping the tape.
Comparing Hips with Other Key Health and Fitness Metrics
Learning how to measure hips forms one part of a complete physical profile. To build a broad understanding of your physique or select perfect garments online, pair your hip data with related anatomical measurements.
Calculating your waist to hip ratio (WHR) involves dividing your waist measurement by your hip measurement. Health organizations use WHR to determine whether body mass is stored around the abdominal organ region or distributed across lower body structures.
Managing localized tissue distribution aligns with comprehensive health efforts like learning how to reduce neck fat naturally and keeping daily activity high.
Additionally, keeping track of upper leg dimensions is essential for athletic body types. If you follow target physical routines like swimmer exercises to tone lower body and core muscles, tracking your hips alongside thigh circumference gives a clear picture of total strength and structural development.
Maintaining Your Tools and Ensuring Long Term Accuracy
Over extended periods of use, cloth measuring tapes can stretch out, particularly if made from low cost woven fibers. If your readings seem erratic or your tape feels overly pliable, check its calibration against a rigid steel ruler.
Store your flexible tape rolled loosely or hung flat in a cool, dry room. Avoid stretching it tightly or storing it in direct sunlight, which can warp vinyl material over time.
Taking proper care of your self care tools reflects a healthy mindset focused on personal wellness and routine maintenance, much like learning how to take care of yourself through consistent habits.
Common Mistakes to Avoid When Measuring Your Hips
Even with step by step directions, small procedural errors can slip into your routine and alter your data. Watch out for these frequent mistakes:
- Measuring Over Heavy Garments: Thick denim, deep front pockets, and heavy seams skew the tape outward. Always measure over undergarments or light form fitting gear.
- Holding Your Breath or Sucking In: Tensing your abdomen or holding air in your chest alters pelvic alignment and shifts soft tissue. Breathe normally throughout the process.
- Allowing the Tape to Sag Across the Back: A drooping tape measure adds excess distance to your reading. Use a full mirror to verify that the loop stays parallel to the floor all the way around.
- Pulling the Tape Too Tight: Indenting soft tissue produces an unrealistically small reading, resulting in restrictive clothing.
- Using Stretched, Old Tapes: Outdated equipment leads to faulty metrics. Replace worn tapes to keep your measurements dependable.
Frequently Asked Questions
Where exactly should I measure my hips?
Measure around the fullest part of your glutes, which represents the widest horizontal circumference of your lower body. This location is usually situated 7 to 9 inches below your natural waist, below your upper pelvic bones. A full length mirror helps confirm you have picked the widest point.
How tight should the measuring tape be pulled?
The tape measure should sit flat against your body, resting snugly without pinching or creating dips in your skin. A helpful rule of thumb is that you should be able to slide one finger beneath the tape comfortably without forcing it.
Is hip measurement the same as waist measurement?
No, they are distinct dimensions. Your natural waist is the narrowest band of your midsection, located above your belly button. Your hip measurement captures the widest region across your buttocks and lower pelvis. Both numbers are required to evaluate fit and compute waist to hip ratios.
Can I measure my hips accurately by myself?
Yes, you can easily measure yourself using a flexible cloth tape measure and a full length mirror. The mirror allows you to check that the tape remains parallel to the floor across your lower back before taking the final reading.
How often should I take hip measurements for fitness tracking?
Taking measurements every two to four weeks is ideal for tracking fitness progress. Measuring daily can be misleading due to natural short term fluctuations in hydration, digestion, and sodium levels.
Conclusion
Mastering how to measure hips is a practical, high value skill for anyone looking to build a well fitting wardrobe, tailor garments, or track fitness progress accurately.
By locating the fullest curve of your glutes, standing with feet together, and verifying that your flexible tape sits level around your frame, you can achieve professional grade precision at home.
Remember that physical metrics are helpful tools designed to serve your functional goals, whether that means ordering well proportioned clothes or building a balanced lifestyle.
Keep your tools in solid condition, record your numbers consistently, and focus on accurate technique to get reliable results every time.