
 Harriet Wetton
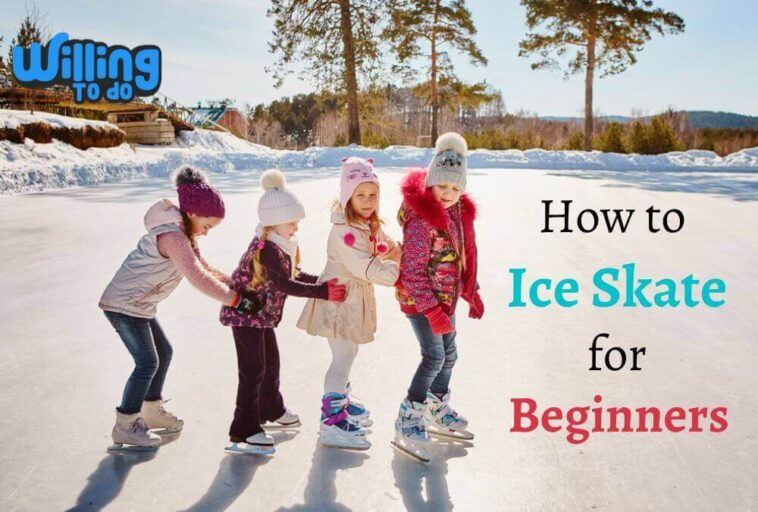
The experience of learning to Ice Skate is incredibly fulfilling. It blends a unique feeling of achievement with vigorous physical exercise that challenges your core and coordination. Sliding effortlessly across a pristine sheet of ice offers a rare feeling of weightlessness.
It combines the athletic demands of strength and balance with the grace of fluid movement. However, if you are standing near the edge of the rink for the first time, looking down at two thin metal blades, that feeling of weightlessness can easily feel like a recipe for falling over.
It is completely natural to feel intimidated when you step onto an ice rink. Watching experienced skaters zoom past at high speeds can make the sport look unattainable.
However, learning the fundamentals is actually much simpler than it appears from the sidelines once you understand how your edges work on the ice. If you have the proper gear, a positive outlook, and a willingness to accept that mistakes are part of the learning process, you can quickly master the basics of gliding.
After you gain confidence with basic steps, you will be prepared to take on increasingly challenging maneuvers. In this comprehensive guide, we will break down every essential skill you need to transition from a hesitant beginner clinging to the wall to a balanced skater enjoying every turn.
Understanding the Basics: How Ice Skating Works
Before stepping onto the rink, it helps to understand the physical connection between your feet and the ice surface. Beginners often assume that blades simply slide across ice because it is slippery. In reality, the science involves pressure, friction, and steel edge control that gives you full command over your movement.
An ice skate blade is not a flat piece of metal. It features a concave groove running down its length, creating two distinct edges: an inside edge and an outside edge. When you Ice Skate, you are constantly balancing on one of these edges or the shallow center flat between them.
The inside edge leans toward the center of your body, while the outside edge leans outward.
When you apply weight to an edge, the blade cuts slightly into the surface, giving you the grip needed to push forward, turn, or stop. Without these defined edges, you would slip sideways endlessly.
Understanding that your blades are designed to bite into the surface provides instant mental reassurance. You are not balancing on a needle point, but rather riding a engineered steel track.
Transitioning to ice movement requires a mental shift if you are used to other activities. For instance, if you already know how to roller skate, you will recognize the core concepts of balance and weight transfer.
However, ice blades offer much less lateral resistance than rubber wheels, making smooth weight placement even more important for staying upright.
Choosing the Right Gear to Ice Skate Successfully
Having the proper gear is essential before you head out onto the ice rink. Your specific goals, such as playing recreational hockey, learning figure skating, or enjoying casual weekend gliding, will determine the kind of equipment you select.
Using improper or ill fitting gear makes the learning curve unnecessarily steep and can lead to foot cramps, ankle strain, or painful blisters.
To assist you in making an informed decision, let us examine the core distinctions between the two main types of rental and consumer skates available at most rinks.
Hockey Skates for Speed and Agility
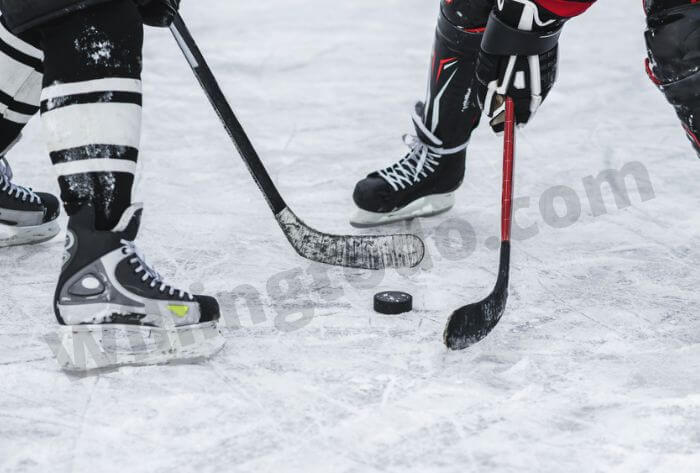
Hockey skates are engineered for quick bursts of movement, sharp turns, and structural protection against impacts. Here are their key defining features:
- Boot Design: The stiff outer shell is made from composite plastics or hardened synthetic materials. This rigid structure provides strong lateral ankle support and protects the foot from stray pucks or stick contact.
- Blade Shape: The blade features a pronounced curve, known as a rocker, at both the toe and heel. This rounded profile allows for rapid directional changes, tight turns, and fast acceleration.
- Fit and Feel: The interior padding is dense and snug. The boot sits slightly lower on the ankle compared to classic figure models, allowing maximum ankle flexion for power strides.
Figure Skates for Stability and Precision
Figure skates are crafted for control, artistic alignment, and specialized maneuvers. Their construction differs significantly from hockey gear:
- Boot Design: Typically made from leather or high grade synthetic leather, these boots extend higher up the ankle to support precise vertical posture and foot control.
- The Toe Pick: Located at the front of the blade, this jagged metal section is used to launch jumps and anchor spins. Beginners must stay mindful of the toe pick so they do not accidentally catch it on the ice while stepping forward.
- Blade Profile: The blade is flatter and longer than a hockey blade, extending beyond the back heel of the boot. This longer contact surface offers superior directional stability for beginners learning to hold a long, steady glide.
For total beginners who simply want to learn basic balance without joining a team sport, figure skates often offer a slightly more forgiving platform. The flatter blade distributes your body weight across a broader surface area, making vertical balance feel more intuitive during your initial attempts.
Dressing for Comfort, Warmth, and Mobility
What you wear on the ice directly affects how long and comfortably you can practice. Many beginners make the mistake of wearing a massive, heavy winter coat that restricts arm movement and causes overheating once physical exertion starts.
Instead of single heavy garments, dress in thin, breathable layers that you can easily remove. A moisture wicking base layer combined with a fleece pullover and a lightweight wind resistant jacket keeps you warm while preserving a full range of physical motion.
Flexible athletic pants or leggings are far better choices than stiff denim jeans, which absorb water rapidly whenever you touch the ice.
Socks require special consideration as well. Throwing on thick, bulky wool socks might seem like a good idea for warmth, but it actually bunches up your foot inside the boot shell. This restricts blood circulation, leading to cold, numb feet and diminished blade control.
Choose a single pair of thin or medium weight synthetic athletic socks or specialized skating socks for the best fit.
Prioritizing personal protection builds immediate mental confidence. Beginners of any age should consider basic protective equipment, including fitted wrist guards, knee pads, elbow pads, and a certified multisport or hockey helmet.
Wearing safety gear eliminates the natural fear of hard surfaces, allowing you to focus entirely on developing your core balance, similar to building functional stability through swimmer exercises without any tool to strengthen your lower back and abdominal muscle groups.
Preparing Your Skates: Sizing, Lacing, and Ankle Support
Even the highest quality skates will fail you if they do not fit correctly or are laced improperly. Improperly laced boots are the single primary reason beginner skaters experience wobbling ankles and arch pain within ten minutes of entering the rink.
Finding the Correct Boot Fit
Skate sizes do not align directly with standard street shoe sizes. Generally, ice skates run one to two sizes smaller than your regular shoes. When putting on an unlaced skate boot, slide your foot forward until your toes lightly touch the front toe cap.
You should be able to slide one finger down behind your heel inside the back boot wall. If you can fit two fingers behind your heel, the boot is too large and will cause slipping and friction blisters.
The Right Way to Lace Your Boots
Proper lacing follows a clear progression from front to top to deliver both comfort and maximum foot control:
Start at the toes with moderate tightness. You want enough space to wiggle your toes slightly without excessive compression. As you move up over the instep and eyelets near the ankle bend, pull the laces firmly.
This middle zone must be locked down tight to pull your heel securely back into the rear heel pocket of the boot.
When you reach the top eyelets or lace hooks around the ankle shaft, back off the tension slightly. Leave enough flexibility in the upper boot so you can bend your knees forward comfortably without the top edge digging harshly into your shins.
If your ankles tilt inward or outward while standing straight on carpet, your lacing is either too loose or the boot shell lacks sufficient structural support.
Your First Steps on the Ice: Building a Solid Foundation
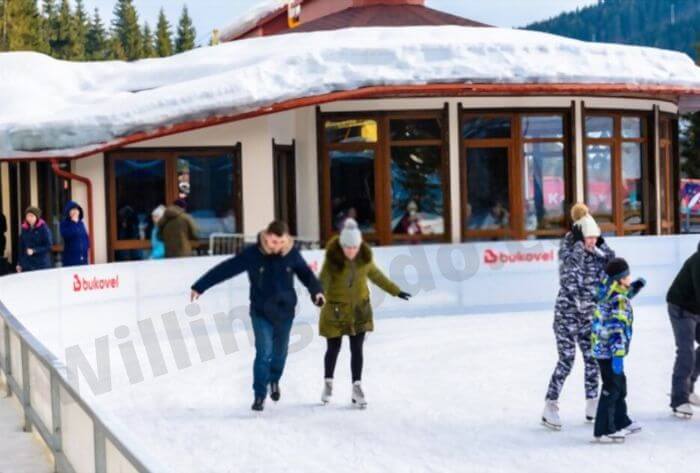
Stepping onto the ice surface for the first time is a unique physical sensation. The surface is slicker than any ground cover you walk on daily. To ease into the environment safely, step onto the ice while holding onto the perimeter boards surrounding the rink.
Hold the railing with both hands initially to get a feeling for how your steel blades react beneath your body. Take small, deliberate steps while standing close to the barrier, getting comfortable with the low friction environment under your feet.
Finding Your True Center of Balance
Once you are standing safely at the edge, focus on your overall posture. Proper body position on the ice differs significantly from standing on dry land:
- Keep Your Knees Soft and Bent: Flex your knees so they extend slightly over your skate laces. Straight, locked legs raise your center of gravity, making you top heavy and vulnerable to sudden backward falls.
- Align Your Head and Torso: Keep your chest elevated, shoulders back, and head up. Look forward across the ice surface rather than down at your feet. Looking directly down pulls your head forward and throws off your natural balance.
- Position Your Arms for Stability: Extend your arms out slightly to your sides, slightly below shoulder height, with your palms facing down toward the ice. This wide stance acts like a tightrope walker’s pole, giving you instant lateral balance corrections.
- Feet Shoulder Width Apart: Keep your skate blades parallel and spaced roughly hip to shoulder width apart. Stacking your feet too close together makes you tippy, while an overly wide stance forces your legs outward unexpectedly.
Practice shifting your body weight gently from your left foot to your right foot while holding the edge rail. Feel how the blade edges grip the ice surface during weight transfers.
Once this sensation feels natural, release your grip on the wall and stand unassisted for a few moments, keeping your knees nicely flexed.
Building this physical control requires patience, focus, and hydration. Staying properly conditioned for any athletic task is essential, and learning how to stay hydrated throughout the day ensures your core muscles remain responsive and free of sudden fatigue or cramping during rink sessions.
Mastering Forward Movement: From Marching to Gliding
Once you can stand comfortably without holding the perimeter wall, you are ready to generate forward movement. The most common mistake beginners make is trying to walk on ice just like they walk down a sidewalk, lifting their feet high and pushing straight backward off their toes.
On ice, this technique results in your feet slipping out beneath you or catching a toe pick.
Phase 1: Marching in Place and Forward Steps
Begin moving forward by marching slowly. Lift one skate a couple of inches off the ice, set it down softly, and then repeat with the opposite foot. Take short, deliberate steps straight forward while maintaining your bent knee stance and wide arm position.
Marching forces you to transfer your weight completely from one leg to the other, which is the foundational balance skill for all future skating maneuvers.
Phase 2: The V Push Technique
To transition from simple marching to actual gliding, you must use the inside edges of your blades to push sideways and backward rather than straight behind you.
- Stand with your heels together and toes turned outward, forming a small “V” shape with your skate boots.
- Flex your knees deeply to lower your center of gravity.
- Press down firming onto the inside edge of your right skate, pushing slightly sideways and backward against the ice surface.
- Allow your body weight to shift over onto your left skate, which will naturally begin gliding forward across the ice.
- As the right leg finishes its push, bring it back underneath your body parallel to your left skate so both feet glide together side by side.
- Repeat the process by pushing off the inside edge of your left skate while shifting your weight smoothly over to your right foot.
Think of this motion as a rhythmic scooting movement. Push off one foot, shift weight, glide on both feet, and then push off the opposite foot.
As your comfort grows, you will be able to hold the single leg glide longer before bringing your feet back together into a comfortable two foot glide.
How to Fall and Get Back Up Safely
Every single skater falls, from total beginners trying their first steps to elite Olympic athletes practicing complex routines. Falling is not a sign of failure; it is simply proof that your body is adapting to new physical challenges.
The key to staying safe on the ice is learning how to control your falls and return to a standing position safely.
Practicing intentional falls on the ice removes the underlying fear of hitting the surface, allowing you to relax your muscles and skate with far greater freedom.
Step by Step Guide to Safe Falling
When you feel yourself losing your balance completely and know a fall is inevitable, follow these steps to minimize impact force:
- Lower Your Center of Gravity Immediately: The moment you feel unbalanced, bend your knees deeply into a low squatting position. Dropping low reduces the distance you fall, significantly lessening the impact energy when you reach the ice.
- Tuck Your Chin and Protect Your Head: Pull your chin down toward your chest to prevent your head from snapping backward against the hard ice surface.
- Fall to the Side: Lean sideways toward your hips and thighs. Try to absorb the impact using the larger, muscular areas of your outer thigh and upper buttocks rather than landing directly on your tailbone or knees.
- Keep Your Hands and Fingers Tucked: Avoid extending your arms out with open palms to break your fall, as this can lead to wrist sprains or fractures. Clench your hands into loose fists and keep your arms folded close to your chest to protect your fingers from stray skate blades nearby.
How to Stand Up from the Ice Correctly
Once you have come to a complete stop on the ice after a fall, follow this structured technique to stand back up smoothly without slipping back down:
- Roll onto your stomach, pull your hands under your chest, and push up onto your hands and knees into a tabletop position.
- Place one foot flat on the ice surface directly between your hands, bringing that skate blade entirely beneath your body with the knee sharply bent.
- Bring your second foot forward, setting its skate blade flat on the ice next to the first foot, keeping your hands resting on the ice surface for front support.
- Press firmly down into the ice through both feet, pushing off your thighs with your hands to raise your upper body into a low squat.
- Slowly extend your legs up into your normal standing posture while maintaining soft, bent knees and wide arms for balance.
Overcoming the mental hurdle of falling builds immense internal resilience. Developing this kind of perseverance is an excellent way of glowing up physically and mentally as you overcome physical challenges and master new skills.
The Art of Stopping: Mastering the Snowplow Stop
Gliding smoothly across the rink is thrilling, but feeling in complete control requires knowing how to stop on demand. The ability to bring yourself to a smooth halt prevents collisions with other skaters and boosts your overall confidence on the ice.
While advanced skaters use aggressive T stops or parallel hockey stops at high speeds, the easiest and most reliable technique for beginners is the **Snowplow Stop**.
How the Snowplow Stop Works
The snowplow stop relies on turning one or both skate blades slightly inward and scraping the flat inside edge across the top layer of ice. This scraping action creates friction, shaving off a small spray of surface ice while gradually slowing your forward momentum until you stop completely.
Executing the Two Foot Snowplow Stop Step by Step
- Build a comfortable, slow forward speed using basic V pushes, then bring both skates together into a parallel two foot glide.
- Widen your stance slightly beyond shoulder width while keeping your knees bent deeply and your upper body upright.
- Turn both toes inward toward each other so your skate boots form an inverted “V” shape (pigeon toed stance).
- Push your heels outward away from your body while applying downward pressure onto the inside edges of both blades.
- Allow the blades to scrape across the surface of the ice, creating friction that brings you to a full, controlled stop.
If applying pressure with both feet feels coordination heavy at first, try a **One Foot Snowplow Stop**.
While gliding forward on both feet, shift most of your weight over onto your left leg. Extend your right leg slightly out to the side, turn the right toe inward, and press the inside edge of that right blade into the ice to scrape away speed while your left foot continues riding smoothly forward.
Advancing Your Techniques: Edges, Turning, and Backward Skating
Once you can move forward, glide with stability, and stop on command, you possess the basic skills needed to navigate any public ice rink safely. From this point forward, your focus shifts toward refining your fluid movement and exploring intermediate skating elements.
Mastering Edge Control and Curved Glides
Skating is rarely done exclusively in straight lines. True control comes from understanding how to ride your inside and outside edges intentionally to create smooth, sweeping curves.
To practice edge work, start a forward glide on both feet. Gently lean your ankles and body weight slightly to the right without twisting your waist. You will feel both blades tilt onto their right edges (the outside edge of your right skate and the inside edge of your left skate).
The skates will naturally track along a smooth, curved arc toward the right across the ice. Shift your weight back to center to return to a straight path, then lean gently left to experience a left hand curve.
Learning How to Execute Crossovers
When skating around the rounded corners of an ice rink, maintaining your speed requires a technique known as **crossovers**. Instead of simply steering around the curve, crossovers involve stepping one skate directly over the other to push continuously through the turn.
To practice forward crossovers moving counterclockwise around a turn:
- Glide into the curve with your left shoulder leading forward and your knees deeply bent.
- Push off the outside edge of your left skate while crossing your right leg directly over top of your left foot.
- Plant your right skate flat on the ice on the inside of the circle line.
- Uncross your left leg by extending it beneath your body, pushing off its inside edge, and stepping it back out to the left to reset your stance.
The Fundamentals of Backward Skating
Skating backward can feel unintuitive at first because you are moving away from your field of vision, but the mechanics are remarkably straightforward once you trust your edge alignment.
The primary pattern for backward movement is called the **Swizzle** or **C-Cut**:
Stand with your toes together and heels pointed slightly outward, forming an inverted “V” shape. Flex your knees deeply, then press outward against the inside edges of both blades while sitting back slightly into your heels.
Your feet will curve outward away from each other and then pull back together at the heels, tracing the shape of an hourglass or lemon on the ice. Repeating this outward push and inward pull generates continuous, smooth backward momentum without ever lifting your skates completely off the ice surface.
Health and Fitness Benefits of Ice Skating
Ice skating is far more than an enjoyable winter pastime or recreational hobby; it is a full body cardiovascular workout that engages major muscle groups while placing minimal stress on your weight bearing joints.
Because ice skating takes place on a smooth, low friction surface, it provides a powerful low impact aerobic exercise. Unlike running or road cycling, which subject knees and hips to repeated hard impacts against pavement, skating allows your joints to move through full fluid ranges of motion without harsh jarring forces.
Key physical health benefits include:
- Core and Lower Body Strengthening: Maintaining balance on thin steel blades constantly engages your abdominal muscles, lower back, glutes, quadriceps, hamstrings, and stabilizer calf muscles.
- Enhanced Balance and Coordination: Continuous adjustments to subtle shifts in your center of gravity sharpen your body’s proprioception (spatial awareness and balance responses).
- Cardiovascular Endurance: Sustained physical effort across a 45 minute rink session burns between 300 and 600 calories while strengthening heart function and lung capacity.
- Joint Mobility and Flexibility: Deep knee bends, weight shifts, and lateral extensions improve flexibility in your hips, ankles, and knees over time.
The mental health benefits of ice skating are equally valuable. Negotiating the cold, crisp environment of a rink requires total present moment focus.
You cannot easily dwell on work emails or daily stressors when concentrating on edge balance and body alignment. This immersive physical focus offers a mental reset, similar to how active individuals learn to manage stress in daily life through structured physical routines.
Integrating rewarding active hobbies into your weekly schedule supports long term physical wellbeing, much like establishing a structured morning routine to build a morning routine for energy that sets a positive tone for your entire day.
Practical Rules, Rink Etiquette, and Safety Tips
Public ice rinks operate on simple shared conventions to ensure every skater, from young children to advanced figure skaters, stays safe on the ice surface.
Adhering to proper rink etiquette prevents accidental collisions and ensures a welcoming environment for everyone.
- Follow Traffic Flow Patterns: Public sessions almost always require everyone to skate in a single uniform direction around the rink (usually counterclockwise). Pay attention to any announcements or staff directions if the direction changes midway through the session.
- Keep the Center Area Clear: The middle section of the ice rink is typically reserved for figure skaters practicing specialized spins, jumps, or lesson routines. Beginners should stick to the outer perimeter near the safety boards.
- Do Not Stop in High Traffic Paths: If you need to rest, catch your breath, or adjust your skate laces, move over to the perimeter wall. Avoid stopping directly in the middle of travel lanes or right behind doors where skaters enter and exit the ice.
- Maintain Space and Mind Your Surroundings: Leave several feet of clear distance between yourself and other skaters. Never weave unpredictably through crowds, and avoid carrying personal items like cell phones or water bottles in your hands while actively moving across the ice.
- Check Ice Conditions Regularly: Pay attention to the surface texture. Deep ruts, gouges, or standing water near melting zones can catch a skate blade edge unexpectedly. If you see a major hole in the ice, notify rink staff immediately.
Approaching new physical activities with respect for rules, consistency, and discipline carries over into all areas of life. Developing this mindset helps build professional discipline, similar to implementing key habits on how to be the best employee through focused effort and continuous personal improvement.
Fast Track Progression Summary for Beginners
To help you structure your practice sessions efficiently, use this clear reference breakdown whenever you visit the ice rink:
| Stage | Primary Objective | Key Skill Focus | Success Benchmark |
|---|---|---|---|
| Stage 1: Preparation | Equipment setup & off-ice alignment | Boot sizing, firm heel lacing, knee flex stance | Ankles stay straight on carpet without tilting inward |
| Stage 2: First Steps | Wall release & unassisted balance | Two-handed rail walk, soft knee bends, 2-foot stance | Standing unassisted on ice for 60 seconds comfortably |
| Stage 3: Propulsion | Generating forward momentum | Marching steps, V-pushes off inside blade edges | Gliding smoothly forward on two feet across the rink width |
| Stage 4: Safety Skills | Fall mitigation & recovery | Side falls, tabletop recovery, knees flex squat | Returning to a standing posture from the ice within 10 seconds |
| Stage 5: Speed Control | Controlled stopping on command | Two-foot snowplow stop, blade edge friction shaving | Bringing your body to a complete halt from a medium glide |
Final Thoughts on Your Ice Skating Journey
Learning how to Ice Skate is a deeply rewarding personal journey that blends physical exercise with a genuine sense of personal achievement.
Every time you step onto the ice, your brain and body work together to refine your posture, master fine edge movements, and build balance. Every fall you navigate safely is simply a stepping stone toward greater resilience and control.
Start slowly, ensure your boots fit snugly and comfortably, keep your knees soft and bent, and allow yourself the freedom to learn through trial and error.
Whether you are gliding across a frozen neighborhood pond in the winter air or practicing inside a bustling indoor rink in the middle of summer, the simple joy of effortless movement on ice remains unmatched. Put on your skates, embrace the process, and enjoy every single glide along the way!
Frequently Asked Questions
1. How should I dress for my first time at an ice rink?
Wear light, comfortable layers that allow for a full range of body motion. Choose synthetic or fleece tops over heavy winter coats so you can regulate your temperature easily.
Avoid heavy denim jeans, which become stiff and wet when exposed to ice. Wear a single pair of medium weight athletic socks, bring thin gloves or mittens to keep your hands warm and protected, and consider wearing a certified helmet for safety.
2. Should I rent skates at the rink or buy my own pair right away?
Renting skates at the public rink is an affordable, ideal way to try the sport during your first few sessions without making a large financial investment. However, rental skates are often well worn and may offer less ankle support.
If you plan to skate more than twice a month, purchasing your own beginner pair ensures consistent fit, proper structural support, and cleaner edges, which speeds up your overall learning process.
3. How can I tell if my ice skates fit correctly?
Your skate boots should feel comfortably snug all around your foot without causing sharp pain or cutting off blood circulation. When standing upright with the boots fully laced, your toes should lightly brush against the front interior wall.
Crucially, your heel must remain locked into the back of the boot pocket without lifting upward when you walk or bend your knees forward.
4. How long does it take for a complete beginner to learn to ice skate?
Most beginners can learn to march forward, hold a basic two foot glide, and execute a simple snowplow stop within two to four practice sessions.
Achieving smooth, relaxed speed, holding long single leg glides, and turning with complete confidence usually requires approximately 10 to 15 hours of structured ice time. Regular weekly practice produces faster results than sporadic, lengthy sessions months apart.
5. Is ice skating safe for young children?
Yes, ice skating is a safe, highly engaging activity for young children when managed properly. Most commercial rinks offer double bladed rental skates for toddlers or heavy plastic balance frames (skating aids) that kids can push along the ice surface while learning balance.
Wearing a fitted bike or multisport helmet, protective wrist guards, and thick gloves is strongly recommended for young learners.
6. Is it harder to ice skate or roller skate?
The difficulty depends largely on individual balance and prior experience. Many beginners find the thin metal blade of an ice skate slightly more intimidating than four wide quad roller wheels.
However, ice provides a much smoother, frictionless glide that requires less continuous pushing energy once momentum is built. If you already know how to roller skate, your existing balance and muscle memory will help you learn to ice skate much faster.