
Hello there, fashionistas! Do you want to add some spice to your wardrobe? Then see through tops are the way to go! This trend has made a strong statement in the fashion industry.
See through tops can give a flirting and fun touch to any look, making them ideal for a day of running errands or a night out. It is all about how you carry yourself and the pieces you choose to pair with your sheer favorites.
Nonetheless, we understand that wearing a sheer shirt can be unsettling. Because of this, we have put together some styling advice for see through tops so you can rock this trend with assurance.
We’ve covered everything from picking the proper occasion to experiment with colors and prints to maintaining your see through top. We want you to feel empowered when you step out the door, knowing your outfit is balanced and chic.
So let’s learn how you may stand out with this daring and iconic style!
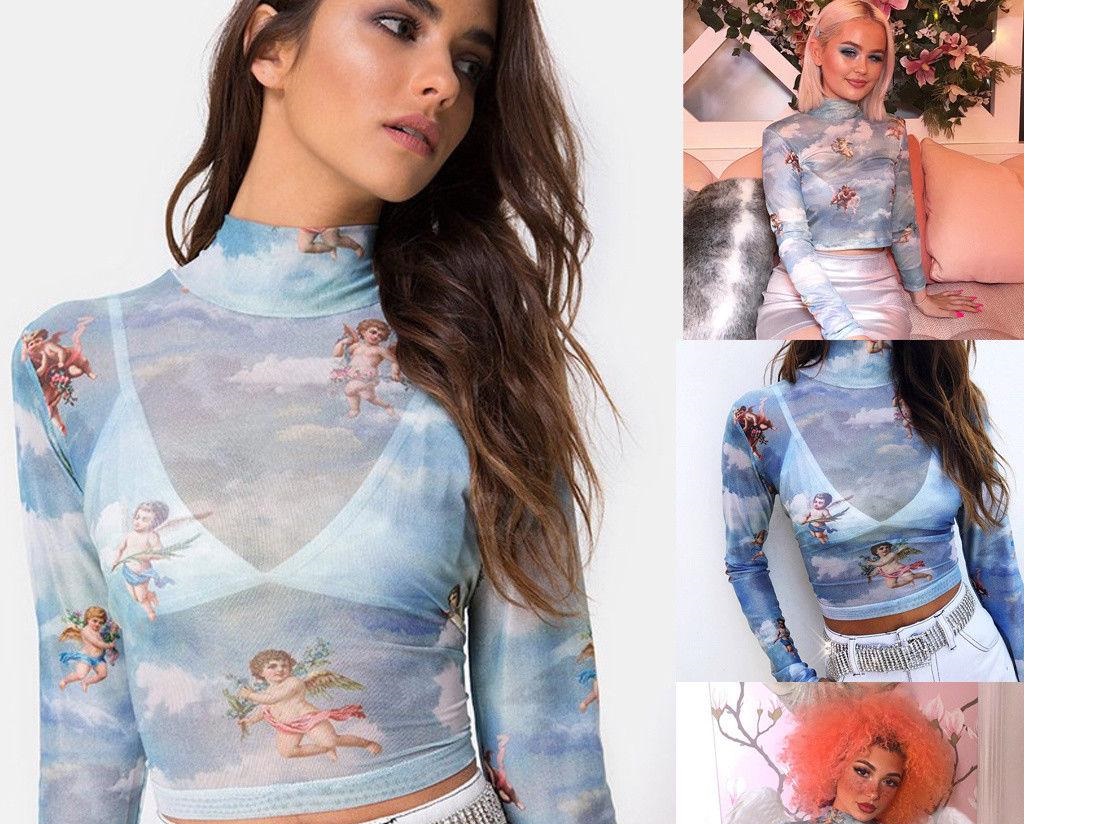
How to style See Through Top:

See through tops are a daring and playful fashion trend that has been splashing in recent years. These sheer tops are a fun way to add elegance to your wardrobe and can be dressed depending on the occasion.
However, wearing a see through top can be intimidating for some people, requiring confidence and creativity. The beauty of the sheer trend is that it allows for layers of depth that solid fabrics simply cannot provide.
If you’re looking to add a see through top to your wardrobe but need help with how to style it, you’ve come to the right place. This article will share tips and tricks to help you rock this daring trend confidently and in style.
We will look at how to select the right undergarments, how to mix textures, and how to ensure you are dressed appropriately for any setting. Whether you are aiming for a soft romantic vibe or something a bit more rebellious, the sheer look is your canvas.
So, let’s dive in and discover how you can create a stunning and unforgettable outfit with your sheer top!
Choose the Right Fabric for Quality and Comfort
The fabric you select can make all the difference in see through clothing. Choose a material that feels excellent on your skin and enhances your figure instead of a low quality or uncomfortable one that could make you self conscious and restless all day.
High quality sheer fabrics like silk organza or fine tulle have a natural structure that looks expensive and intentional.
One popular fabric for sheer tops is chiffon, which is lightweight and flowy, perfect for a romantic or poetic look. Lace is preferred since it gives each outfit a feminine, delicate touch.
See through cotton or linen tops can give your collection a casual and playful touch. Mesh is also a fantastic choice for those who want a sporty or edgy aesthetic. Each fabric tells a different story, so pick the one that aligns with your personal vibe.
The key to selecting the best fabric for your see through top is to prioritize comfort and style. You can feel secure and comfortable in this daring and unique fashion if you choose a high quality material that flatters your physique and matches your style.
Remember that thinner fabrics require more attention to what is underneath, while textured lace can be a bit more forgiving.
Layer Your Look for Maximum Impact
Layering a see through top with extra clothes is one of the simplest ways to wear it. Under a see through blouse, a tank top, camisole, or bandeau can be worn to provide coverage while preserving the sheer impression.
If you are heading to a professional environment, a high neck camisole in a matching shade provides a sophisticated and safe way to wear the trend.
Alternately, layer a sheer top over a bralette or crop top for a bold and edgy appearance. This is a classic look for summer festivals or night time events. You can also reverse the idea by wearing a sheer top under a slip dress or a structured blazer.
This adds a level of visual interest and texture to your outfit without showing too much skin. If you are working on your personal style, learning how to glow up your wardrobe often starts with mastering these layering techniques.
Accessorize Appropriately to Balance the Sheer
To make a see through top work, accessorize it appropriately. A spectacular necklace or earrings can divert attention away from the sheer fabric while adding glam to your outfit. High waisted pants or a skirt help balance the outfit and give it a more modest feel.
Since the top is often the focal point, you want your accessories to support the look rather than compete with it.
To keep the focus on the top, choose shoes that are neutral or solid in color. A sleek pair of boots or classic pumps can pull the whole look together.
If your top is highly detailed, such as a floral lace see through top, keep your jewelry minimal to avoid looking cluttered. On the other hand, a simple black mesh top can handle chunky gold chains or bold statement belts.
Be Confident and Own Your Look
Confidence is essential while wearing a sheer top. You could need more confidence to pull off this risky style if you feel self conscious. Start by attending a small gathering of friends or wearing your transparent top around the house.
When you feel good in what you are wearing, it shows in the way you walk and talk. You may even find that you need to gain thick skin when trying bold trends, but once you find your rhythm, you will feel unstoppable.
You can gradually work your way up to wearing it in public as you get more at ease with it. Always maintain your sense of style with see through tops. Remember that fashion is subjective.
If you feel beautiful and powerful in your see through top, then you have already won the fashion game. Confidence is the best accessory any woman can wear.
Consider the Occasion and Environment
When choosing a see through top, it’s essential to consider the occasion. Choose a sheer top with an attractive design, such as lace or an embroidered pattern, for a formal evening. Pair it with a high waisted skirt or pants and heels to achieve a classy and polished style.
For these events, choosing underpinnings that match your skin tone exactly can create a very elegant and high end effect.
Choose a sheer top that is light and breezy, such as a chiffon blouse, for a casual occasion. Pair it with denim shorts or jeans and sandals for a comfortable and effortless look.
If you are going to a place with a strict dress code, you can still participate in the trend by wearing a see through top under a jacket.
This allows just a hint of the fabric to show, which is very stylish. Learning how to be the best dressed in the room is all about understanding these nuances.
Wear a more modest sheer top if you need clarification on the dress code. You can always dress up your style with accessories like a dramatic necklace or colorful earrings.
Remember that the goal is to balance being bold and being suitable. A see through piece is a statement, so let it speak for itself in the right environment.
Experiment with Colors and Prints
Please don’t be scared to experiment with different colors and prints regarding see through tops. Sheer fabrics can make any look more lively and seductive.
Vibrant, bright colors like red, purple, or yellow can make a statement and demonstrate your personality.
If you prefer neutrals, try a sheer top in a subtle tone, such as beige or grey. These tones are excellent for creating a “naked” look that is very popular in modern fashion trends.
When it comes to prints, the possibilities are limitless. Polka dots, stripes, and florals are popular patterns that can give a colorful touch to your look. Try a sheer top with a textural design, such as crochet or embroidery, for a more understated style.
Animal prints in mesh fabric can also add a wild and fun element to your night out ensemble. The idea is to select a print or color that expresses your unique style and personality. You can even look into fashion verse insights to see how the industry is evolving with colors.
Play with Proportions and Silhouettes
See through tops can be worn in a variety of dimensions. Pair a sheer crop top with high waisted jeans or shorts for a more relaxed vibe. This combo can draw attention to your curves while giving you a modern, youthful look.
Pair a sheer blouse with a pencil skirt or slacks for a more formal look. This combination might result in a polished and classy appearance that works well for dinner dates or gallery openings.
If you’re feeling brave, try wearing a sheer top with a tiny skirt or shorts for a bold and daring look. Layer a thin shirt over a camisole or tank top for a more modest look.
This combination can provide excellent coverage while keeping the mere appearance. When you play with proportions, think about the weight of the bottom piece.
A heavy leather skirt looks incredible when paired with a light, airy see through top. Contrast is a powerful tool in styling.
To ensure your silhouette looks its best, you might want to learn how to measure hips or other body parts correctly so your clothing fits perfectly. A sheer top that is too tight can sometimes lose its elegant drape, so finding the right size is crucial for this specific trend.
Care for Your See Through Top with Patience
Sheer textiles can be delicate and require careful care. Always read the care label on your top and carefully follow the directions. Because sheer fabrics can easily snag and tear in a washing machine, they should be hand washed or dry cleaned.
Wash your sheer top with moderate detergent and cold water to avoid harming the fabric. If you have other delicate items, you might already know how to wash a weighted blanket or other specialty goods, and sheer tops require that same level of attention.
Avoid placing your sheer tops in the dryer since the excessive heat might cause the fabric to shrink or damage. Instead, lay them flat to dry or hang them to dry on a padded hanger.
If you need to iron your sheer top, use a low heat setting and a thin towel to protect the fabric from direct contact with the iron. Proper care ensures your favorite see through top remains a staple in your closet for a long time.
Get Creative with Advanced Styling
There are countless ways to wear see through tops, so don’t be afraid to experiment. For a beachy appearance, put a translucent blouse over a swimsuit, or wear a mesh top over a colorful bralette for a festival inspired look.
Pair a sheer shirt with leather pants or a denim jacket for a more edgy vibe. This combination has the potential to produce a stylish vibe that is both modern and timeless.
Accessories can also play a significant role in creating a unique and stylish outfit. Pair a sheer top with eye catching statement jewelry like thick bracelets or large earrings.
You can even mix seasonal pieces, such as knowing how to wear a blanket scarf over a sheer blouse during the transition from fall to winter. This creates a cozy yet alluring look that is very popular in street style photography.
Embrace Your Confidence and Body Positivity
Above all, the secret to confidently wearing see through clothing is embracing your body and feeling at ease in your flesh. Sheer materials might be intimidating, but they can create an eye catching and memorable style when worn confidently.
It is not about how much skin you show, but about the art of the outfit itself. When you learn how to take care of yourself, your natural beauty shines through any fabric.
Remember that see through tops are intended to be flirty and fun, so don’t take them too seriously. Experiment with various styles, colors, and prints until you create a natural look.
Most importantly, enjoy yourself! Fashion should be a joy, not a source of stress. Whether you are dressing for yourself or an event, your see through top is a symbol of your willingness to try new things and push boundaries.
Frequently Asked Questions (FAQ)
What do I wear under a see through top for a professional look?
To wear this trend at the office, choose a high quality camisole or a silk tank top in the same color as your sheer blouse. This provides full coverage while allowing the texture of the see through top to be seen. Pairing this with a blazer further ensures the look is work appropriate.
Can I wear a sheer top if I am shy?
Yes! You can start by wearing a sheer top that has heavy embroidery or prints, which naturally obscures the skin more than plain mesh. You can also layer a sheer top under a sweater or dress so that only the sleeves or neckline are visible. This is a great way to ease into the trend.
How do I choose the right bra for a sheer shirt?
If you want the undergarment to be invisible, choose a seamless nude bra that matches your skin tone. If you want the bra to be part of the outfit, a lace bralette or a solid black bandeau can look very intentional and stylish under a see through top.
How do I prevent my sheer top from snagging?
Avoid wearing jewelry with sharp claws or jagged edges that can catch on the fine threads. Also, be mindful of your handbag straps. When washing, always use a mesh laundry bag to keep the delicate fabric safe from zippers and buttons of other clothing items.
Are see through tops only for night time?
Not at all! You can wear them during the day by choosing lighter colors and pairing them with casual items like light wash jeans or a denim skirt. A white chiffon see through top over a simple white tank top is a beautiful, airy summer daytime look.
Conclusion
So, there you have it, our guide to see through tops! Whether you’re a fashion lover or just looking to try something new, we hope you found these tips helpful and inspiring.
Fashion is a continuous journey of discovery, and the sheer trend is one of the most exciting paths you can take.
From choosing the suitable fabric to styling your sheer top, we’ve provided various helpful tips and tricks to help you achieve the perfect look.
But at the end of the day, the most important thing is to have fun with this trend and express your unique style and personality. There are no hard rules, only guidelines to help you feel your best.
So don’t be afraid to try different fabrics, styles, and colors and see how you can make a statement with your sheer top.
Whether dressing up for a night out or adding a playful touch to your everyday wardrobe, see through tops can be a versatile and exciting addition to your closet.
You can even look into other ways to style pieces, like wearing an infinity scarf, to keep your look fresh and layered.
Just remember to choose a comfortable and flattering fabric on your body. Experiment with different styling techniques to find the look that works for you.
You can feel confident and fabulous in this daring and unforgettable trend with the right attitude and styling.
So go ahead and try it, we can’t wait to see how you rock this trend!